3 for 1 – bench, table, picnic table! As always find the plans below for creating your own. Find plans for the Folding Bench here: https://bit.ly/3h2LZOi Simple Strap has been a staple in my tool box for months now – check them out here: https://simplestrap.me/NOW Find my AW merch here: https://wilkerdos.com/product-categor… Patreon: https://www.patreon.com/user?u=257047 Instagram:  / wilker_dos Website: https://www.wilkerdos.com Facebook:
  / wilkerdos
Want to support me? Support the companies that support me:
Triton Tools: http://bit.ly/2jaC0dD
ISOtunes: http://bit.ly/2rVobCD
Rockler: http://bit.ly/2oWrisB
Armor Tool: http://bit.ly/2PjJuKJ
Things I Used in This Project:
ISOtunes Ear Protection: http://bit.ly/2YuZBtr https://bit.ly/2Cf6OXP
Armor Workbench: http://bit.ly/2JL03ix
Triton Thickness Planer: https://bit.ly/2PJQn9a
Miter Saw Stand: http://bit.ly/2XKAo0J
Clamps: https://amzn.to/2YZ0Dxk
Triton SuperJaws: http://amzn.to/2qFLYJF
Armor Pocket Hole Jig: http://bit.ly/31TeZRi
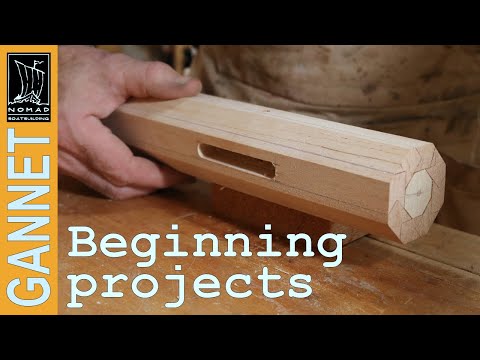
okay in this video i’m gonna be making a three for one
it’s a bench or is it a table or is it a picnic table
let me show you how i made it for this project i’m actually using the leftover
seed or two by fours i have on hand from building a fence
so i first had to load it up and transport it over to my personal shop
from my commercial retail space the woodshed
anytime i’m hauling lumber these days i always reach for one of my simple straps
this is extremely flexible strapping that sticks to itself regardless of
if it’s wet or dry you just need a few wraps then tuck the end
into itself they come in long strips but are meant to be cut to length which is
quick to do with a simple pocket knife for this project i’m actually using the
leftover cedar two by fours i have on hand from building a fence
so i started off by loading them onto my armor tool mobile workbench and getting
them ready for building personally when i work with cedar i
always run the boards through my thickness
planer first to remove the roughness and save on sanding later on
then i moved all the boards over to the miter saw to start cutting up the needed
pieces if you’re interested in a full cut list
and material list for this project i have plans linked for you down below
since i was going off my cut list i was able to process
all of my boards at the same time and just a tip for you i
always move my workbench in line with my miter saw stand so that i can pull my
material directly off and into position
after everything was cut then i started assembling
this bench will be for kiddos so it’s lower to the ground but
know that you can very easily raise it up higher for adults
you just need longer legs i grabbed what will be the two legs
and the stretcher that connects them and started putting them together
you can see that i used a scrap near the bottom to make setting the legs in place
easier i applied some outdoor wood glue then once the top was flush all the way
across i used the countersink first and then drove in two screws
per leg after attaching the first i repeated on the second
then i made another assembly identical to it for the other side
if you’re making both benches at the same time then you would want to make
four total then i set those aside and started
making the bench seat for this i laid out four two by fours on
my workbench and lined up the ends flush to each other
i first found center on the bottom board then started attaching a center support
member again using the countersink first then
driving in the screws after attaching it to the bottom board i
moved to the top board and repeated note use a speed square to ensure you’re
attaching this board on at a 90. now that i have the top and bottom
attached i cut a spacer to make spacing out the remaining boards equal
then i went back to the center and attached the center support to these
middle two boards as well now we can attach the two the ends won’t
want to stand up on their own so i grab some clamps to increase their
footprint and this works like a champ at least
well enough for me to grab the bottom and set it into place
next was attach them together i first applied wood glue then use screws and
all of the boards to go into the leg assembly
and i recommend using a speed square here to ensure the leg is
not only square to the bench seat but also vertically from the ground
after checking both planes i drove in the screws on both sides
again using my spacer to make sure everything was nice and even
alright now let’s add the left and right supports that will join the bottom
boards together and stiffen up the seat easy enough
let’s move on to making the top this is almost the same as the seat
except it has more supports in the center of it
so i first laid out my marks according to my plans then set the boards in place
once i confirm that it all looked equal i attached them
now on to the arm assembly for this i first cut the two pieces that
make up the bottom and the front of the arm and then use my
triton super jaws to join them together it’s worth noting that i first only used
wood glue and screws here but later came back and added some dowels to
reinforce this joint some once i was put together i added a strap
hinge this is the part that will allow the
bench to convert into a table by folding up or down by folding
after getting it attached to the bottom of the assembly i moved to the top and
added on what will be the back this is also the part that will allow me
to attach this entire unit to the back itself
i set it in place then used a clamp to secure everything down
while i drove in screws okay so let’s set it in place now and figure out where
it needs to be set in order to fold forward and work properly there
isn’t an easy way to set it in place then
start folding it forward to mark the needed screw locations without moving it
so i ended up cutting a scrap to link so that i could flip the top forward and
it hold it in place for me and this worked beautifully
once it was forward i was able to use the countersink and screws to attach the
hinge in the needed location okay it isn’t
completely done yet but let’s try it out
that’s pretty neat huh
okay last part that’s needed is the arm simple enough
i used a roll of tape off my workbench and used its curved surface to trace a
round shape on my 2×4 and then i cut it out over at the
bandsaw now this arm can be attached to the entire assembly
and if you build this definitely follow my plans instructions instead of what
i’m doing here remember that as i’m building these
projects on video i’m building them for the first time
so if i see something that can be refined or done easier then i make that
change in the plans to help people who want to replicate the project
so anyways it would be much better to attach the arm in place before the
entire arm assembly gets attached but i made it work by using my armor
tool pocket hole jig and connecting it in that way from
underneath okay let’s see how that works so it’s a bench that can be tucked on a
port but then easily converted into an eating station in just a few seconds
then if you go through all the steps to build an identical second
they could be moved together and turned into a larger seating area
that could go back to two benches after all the festivities are done
i personally don’t think these will be moved together very often
but the fact that it’s another option is pretty cool
remember that if you want to build your own then i have a set of plans over on
my website to download also if you’re interested in outdoor
furniture then check out my website where i have plans and templates for a
ton of other projects such as a folding adirondack chair
rocking chair and poor swing i really hope that you have
enjoyed this video i’ve left the links to everything i mentioned down in the
description also if you’re interested in an aw hat
or other aw merge then that’s also link for you down below
i will see you on whatever i’m building next
monday morphin picnic tables
if you’re looking for some great software’s plans then i have a link for
you right here for this one as well as two other
variations this one’s cheap it’s sturdy it’s very
quick to put together and the thing that i like the best is that
it’s pulled
and it’s collapsible