Installing The Topside Battens | Temptress 1/4 Scale Boat Build Part 24
2 min read
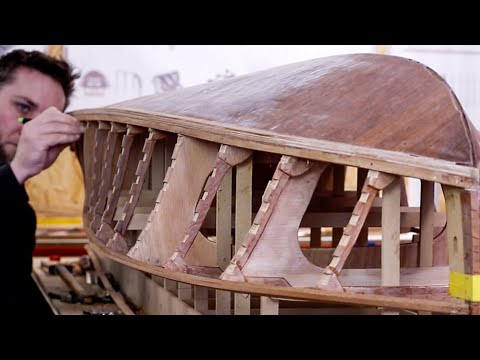
In this video I am installing the topside battens. We begin by marking out their position as placed in the previous video. Then I am cutting the notches to set them into the frames and looking at how this can allow us to begin fairing the hull as we go.
– Support the Channel –
I am currently hoping to begin building enough revenue from my videos and online products so that I can begin building a full size version of Temptress. If you would like to help make that happen then here are a few ways that you can support the channel, project and help to get a build in progress.
Support the channel and business on Patreon: https://www.patreon.com/danleeboatbuilding
Buy yourself some Temptress merch: https://danleeboatbuilding.myspreadshop.co.uk
Buy yourself a set of Temptress model or full size plans if you’d like to build one: https://danleeboatbuilding.co.uk/product/temptress-24ft-runabout/
– About the Project –
In this series I am building a 6′ model version of our new boat design Temptress. The reason for building the boat in that size is so that I can show the process, exactly the same as it will be for the full size boat with everything scaled down. It will offer a full tutorial on how to build the boat, be a test run for myself and also give me a demo model that I can take to boat shows.
Plans are available to buy for both the full size boat and a simplified, slot together, plywood scale model plan set. Note that in this video series I am working from the full size boat plans. For details on the scale model plan set, take a look at this video: https://www.youtube.com/watch?v=4_liKxeQCoI
#scalemodel #boat #coldmoulding
Chapters:
0:00 Installing topside battens
23:02 What’s next?
For more regular updates, find me below
– Website –
– Patreon –
https://www.patreon.com/danleeboatbuilding
– Facebook –
https://www.facebook.com/danleeboatbuilding/
– Instagram –
https://www.instagram.com/danleeboatbuilding/


